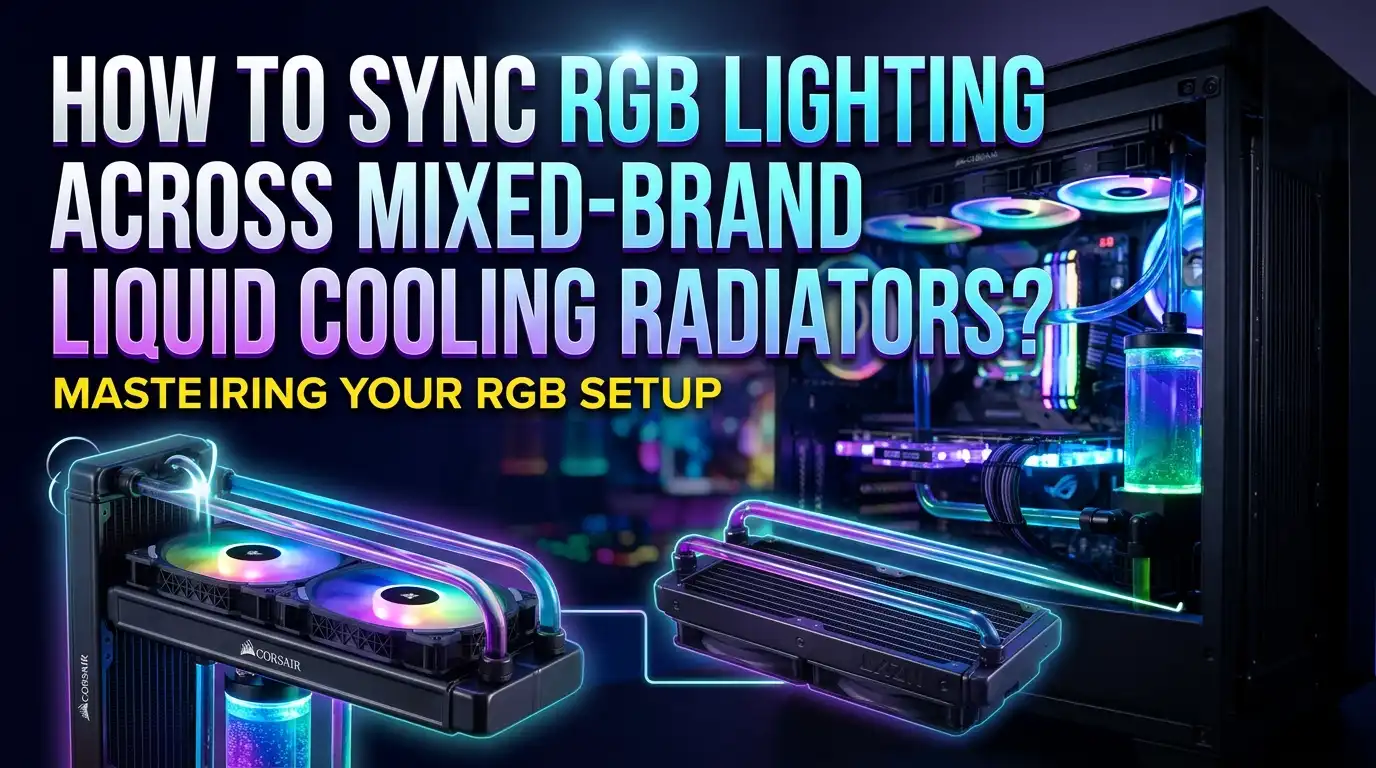
How To Sync RGB Lighting Across Mixed Brand Liquid Cooling Radiators?
Building a PC with multiple liquid cooling radiators looks amazing. Mixing brands gives you better performance options and lower prices. But the RGB lighting often refuses to cooperate. One radiator glows blue while another flashes rainbow. Your dream build looks like a confused disco floor.
This problem frustrates thousands of PC builders every year. Different brands use different software, different connectors, and different protocols.
The good news is that you can fix this. Several methods exist to bring every LED under one command. This guide walks you through every solution. You will learn the hardware, the software, and the wiring tricks that work.
Key Takeaways
- Check your RGB type first. Mixed brand radiators usually use either 4 pin 12V RGB or 3 pin 5V ARGB headers. These two standards do not mix. Plugging the wrong one fries your LEDs.
- Universal software saves the day. Tools like OpenRGB and SignalRGB can control hardware from Corsair, NZXT, Lian Li, EK, Thermaltake, and more under one interface.
- Hardware controllers act as translators. An ARGB hub or a dedicated controller box converts proprietary signals into standard ones. Brands like Cooler Master, Razer, and Phanteks make solid universal options.
- Motherboard sync still matters. ASUS Aura, MSI Mystic Light, Gigabyte RGB Fusion, and ASRock Polychrome support most standard ARGB devices when wired correctly.
- Patience pays off. Some brands lock their devices behind their own software. You may need adapter cables, splitters, or firmware updates to make everything respond as one unit.
- Plan before you buy. Reading the spec sheet for each radiator saves hours of troubleshooting later.
Understand The Two Main RGB Standards Before You Start
Every RGB device follows one of two standards. The first is 12V RGB, which uses a 4 pin connector. This older standard lights every LED the same color at the same time. You cannot create patterns or waves. It is simple and cheap.
The second is 5V ARGB, also called addressable RGB. It uses a 3 pin connector with a missing middle pin. Each LED can show its own color. This lets you run rainbow effects, chase patterns, and full sync sequences.
Mixing these two standards directly will damage your hardware. A 12V signal sent into a 5V ARGB strip burns out the chips inside. Always look at the header on your motherboard and the cable on your radiator before plugging anything in.
Most modern radiators from Corsair, NZXT, Lian Li, EK, and Cooler Master ship with ARGB lighting. Older budget radiators may still use 12V RGB. Check the manual or the manufacturer website for confirmation. Some radiators even use a proprietary connector that looks similar but carries a different signal. Lian Li UNI fans and Corsair iCUE fans are good examples.
Knowing your standards early prevents costly mistakes. Write down what each radiator uses. Then plan your sync strategy around that list.
Identify Proprietary Connectors Versus Standard Headers
Several brands use connectors that look like standard ARGB but are not. Corsair iCUE fans use a 4 pin proprietary connector that carries both power, PWM, and RGB data through one cable. NZXT uses its own RGB and Fan Controller box with custom plugs.
Lian Li UNI fans ship with their own controller and a special edge connector that links fans together in a chain. Thermaltake Riing Plus fans need a Thermaltake controller to function. Plugging these into a standard motherboard header gives you nothing or, worse, a short circuit.
Always identify the connector type before mixing brands. Look at the pin count, the pin spacing, and the keying notch. A magnifying glass helps. Compare against pictures on the brand support page.
You have three options when you find a proprietary connector. First, use the included controller and sync it through software later. Second, buy an adapter cable that converts the proprietary plug to a standard 3 pin ARGB header. Third, replace the radiator fans with universal ones that use standard plugs.
Adapter cables exist for many brands. Lian Li sells cables that convert UNI Fan signals to standard ARGB. Some third party makers offer Corsair to ARGB adapters too. These let you free your hardware from brand lock in and treat every fan and pump as a standard device.
Pick A Central Control Method That Fits Your Build
You have three main ways to control mixed brand RGB. The first is the motherboard method. You plug every ARGB device into your motherboard headers and use the board software to drive them. This works well for small builds with two or three devices.
The second is the hardware hub method. You buy a dedicated controller box that takes one input from the motherboard and splits it into many outputs. This suits builds with eight or more fans and pumps.
The third is the universal software method. You install a program like OpenRGB or SignalRGB that talks to multiple brands at once. This is the most flexible path.
Pick your method based on the number of devices and the brands involved. A build with a Corsair AIO, an EK radiator, and Lian Li fans benefits most from a universal software setup. A build with only an NZXT cooler and ASUS motherboard works fine with native sync.
Think about future upgrades too. If you plan to add more RGB later, a hub gives you headroom. Most controllers offer six to eight ARGB ports. Spending a bit more now saves headaches when you add new parts.
Use OpenRGB To Control Almost Any Brand
OpenRGB is a free open source program that supports hundreds of RGB devices. It runs on Windows, Linux, and macOS. The team behind it adds new devices every month. You can find Corsair, NZXT, Razer, ASUS, Gigabyte, MSI, Cooler Master, and many others on the supported list.
Installing OpenRGB takes about five minutes. Download the latest release from the official site. Run the installer with administrator rights. Open the program and click Scan. It detects every supported device automatically.
Once detected, every device shows up in one window. You can pick a color, a pattern, or a sync mode and apply it to all of them at once. The program ignores brand boundaries and treats every LED as a generic addressable light.
OpenRGB also includes plugins. The Effects Engine adds wave, rainbow, and breathing modes. The Hardware Sync plugin links lighting to CPU temperature, fan speed, or audio. You can build your own profiles and switch between them with one click.
The downside is that OpenRGB does not support every proprietary controller. Some Corsair Commander Pro units and newer NZXT hubs need extra steps. The community forum lists workarounds and beta drivers for tricky cases. For most builders, OpenRGB solves the mixed brand problem in one install.
Try SignalRGB For A More Polished Experience
SignalRGB offers a paid alternative to OpenRGB with a more polished user interface. It supports popular brands like Razer, Corsair, EVGA, SteelSeries, Logitech, NZXT, Lian Li, and many more. The free tier includes basic colors and effects. The pro tier unlocks audio sync, screen mirroring, and custom shaders.
The biggest strength of SignalRGB is its effect library. You get hundreds of community made animations. Some react to your game, your music, or your desktop wallpaper. This makes mixed brand builds look like one unified light show instead of scattered LEDs.
Setup follows the same pattern as OpenRGB. Install the app, let it scan, then assign each device to a layout. The drag and drop layout editor maps every fan, radiator, and strip to a 2D grid. Effects flow across the grid as if all your devices were one big screen.
SignalRGB also disables brand software in the background. This prevents conflicts where iCUE and Aura fight over the same device. The takeover is clean and reversible.
The pro version costs a monthly or yearly fee. Some builders find it worth the price for the polished feel. Others stick with OpenRGB for free. Try both before you commit. Each takes only minutes to install and test.
Set Up A Hardware ARGB Hub For Stable Wiring
A hardware ARGB hub gives every radiator a clean signal path. Brands like Phanteks, Cooler Master, Razer, and DeepCool make hubs with six to ten 3 pin ARGB outputs. The hub takes one input from your motherboard or a SATA power cable and feeds every output the same data stream.
This setup removes the need for daisy chaining multiple radiators through the motherboard. You wire each radiator into the hub. The hub then talks to one ARGB header on the board. Software sees the hub as one big device with many LEDs.
Pick a hub with enough ports for your current and future needs. Count every fan, every pump, every strip. Add two extra ports for upgrades. A six port hub fills up faster than you expect.
Mount the hub in a clean spot inside the case. The back of the motherboard tray works well. Use double sided tape or magnetic feet that come with many hubs. Keep the cables short and tidy. Long ARGB cables can cause signal drop and flicker.
After wiring, open your motherboard software or universal app. The hub appears as a chain of addressable LEDs. Tell the software how many LEDs sit on each port. This step is called mapping and it makes patterns flow in the correct direction.
Wire Your Radiators With The Right Splitters And Cables
Cable management matters more than you think. Each radiator usually has two or three fans, plus a pump block with its own RGB. That can mean six to nine RGB cables on one side of your case. Splitters combine multiple fans into one header. Extension cables route signals to distant headers.
Use only certified ARGB splitters. Cheap ones can drop voltage and cause flicker. Look for splitters that match the gauge of your fan cables. A 1 to 3 splitter feeds three fans from one header. A 1 to 5 splitter handles a full radiator set.
Never split a 12V RGB header into more than four to five devices. The current draw adds up fast. Same for ARGB, where the data signal weakens over long chains. Read the limit listed in your motherboard manual. Most boards allow up to 60 LEDs per header for ARGB.
Label every cable with masking tape and a marker. Write the brand and the role on each tag. This saves hours when something stops working and you need to trace the chain. Route cables through grommets and behind the tray. Use velcro straps instead of zip ties for easy changes later.
Finally, plug everything in only when the PC is powered off. Hot plugging ARGB devices can damage them. Double check polarity before pressing the connector home.
Use Motherboard Software If You Have Same Brand Headers
If your motherboard and your radiators share a brand or a compatible standard, native software is the easiest path. ASUS Aura Sync, MSI Mystic Light, Gigabyte RGB Fusion, and ASRock Polychrome Sync all support standard 3 pin ARGB and 4 pin RGB devices.
These programs detect any device plugged into the board headers. You pick a color and a mode, and every connected LED follows. The downside is that they only see devices on the motherboard headers, not those running through brand specific controllers.
This method works best when your radiators came with bare ARGB cables and no proprietary hub. Many EK radiators, some Alphacool models, and budget Corsair Hydro units fit this profile. Plug them into the board, fire up the software, and they sync.
To make different brand radiators look the same, stick to simple effects. Static color and breathing patterns hide differences in LED density and color accuracy. Rainbow chase patterns highlight every small mismatch.
If you have a Corsair AIO with iCUE in the same build, you can still use motherboard sync for other devices. Just set both apps to the same color and mode. The result is close enough for most eyes. For a true unified look, switch to a universal tool like OpenRGB or SignalRGB.
Match Colors And Effects Across Different LED Densities
Even after syncing software, your radiators may look slightly different. One brand uses 8 LEDs per fan, another uses 16. One uses warm white LEDs, another uses cool. Color science between brands varies a lot. Pure red on a Lian Li fan does not match pure red on a Corsair fan exactly.
To minimize this mismatch, calibrate colors by eye in your software. Set every device to the same hex code first. Then adjust brightness and saturation per device until they look identical. Take a photo with your phone to compare. The camera reveals differences your eyes miss.
Use simple solid colors for the cleanest look. Effects like rainbow waves expose LED count differences immediately. If you must run patterns, slow them down. A slow breathing cycle hides timing gaps between brands.
You can also tune brightness. Lower the brightest fan by 10 to 20 percent to match the dimmer ones. This trick balances the visual weight of your build.
Some builders add a diffuser strip over each fan or radiator. A thin strip of frosted plastic blends individual LEDs into a smooth glow. This trick erases brand differences instantly. You can buy these strips or cut them from sheets of acrylic.
Finally, light the case interior with neutral white from a separate strip. This base lighting balances the colored accents and makes mismatches less obvious.
Solve Common Sync Problems And Glitches
Several issues pop up in mixed brand RGB builds. Flickering LEDs usually mean weak power or a broken cable. Check the SATA power connection on your hub. Reseat each ARGB cable. Try a different splitter.
Stuck colors happen when two programs fight for the same device. Close iCUE before opening OpenRGB. Disable startup launches for brand apps you no longer want. Windows Task Manager helps you find background processes that block control.
A radiator that refuses to sync often has the wrong LED count set in software. Open your control app and edit the device entry. Set the LED count to match the physical number on the radiator. Patterns will then flow correctly.
If one radiator runs a different effect from the rest, check your sync groups. Most apps let you group devices into zones. Make sure every radiator sits in the same zone. Apply the effect at the group level, not the device level.
Driver conflicts also break sync. Update your motherboard chipset drivers and your USB drivers. Many ARGB controllers connect over an internal USB header. A bad USB driver causes random disconnects.
When all else fails, reset everything. Unplug power, hold the power button for 30 seconds, then plug back in. Open your control app and rescan. This clears stuck states and refreshes device communication.
Plan Future Upgrades With Compatibility In Mind
When you add more parts later, keep RGB compatibility in your buying decision. Always check the connector type listed on the product page. Look for the phrase standard 3 pin 5V ARGB in the specs. Avoid proprietary connectors unless you really want that brand feature.
Buying within one ecosystem is the easiest path, but it locks you into one brand forever. Buying universal parts costs slightly more but gives you freedom. The choice depends on your priorities.
Read reviews that mention software compatibility. Some products work with OpenRGB but not SignalRGB, or the reverse. The community forums for each tool list supported hardware. Search before you buy.
Keep your purchase receipts and original packaging. If a part refuses to sync, you may need to return it. Most retailers accept returns within 30 days. Test every new RGB part within that window.
Consider building a small reserve of cables and splitters. ARGB cables break or get lost during builds. Having spare 3 pin extensions, 1 to 3 splitters, and adapter cables saves trips to the store.
Finally, document your build. Write down which device sits on which header, what software controls it, and what LED count it uses. A simple text file saves hours when you swap a part or troubleshoot later.
Final Thoughts On Unified RGB Across Brands
Mixing brands in a liquid cooled build gives you the best of every world. You can pick the best radiator, the best fans, and the best pump from different makers. RGB sync used to be the price you paid for this freedom. That is no longer true.
Modern tools like OpenRGB and SignalRGB break down brand walls. Hardware hubs simplify wiring. Adapter cables free proprietary devices. With a bit of planning, every LED in your case can dance to the same beat.
Start by listing your devices and their connector types. Pick a control method based on that list. Wire everything cleanly. Install the software. Calibrate colors. Then sit back and enjoy the show.
The hobby keeps growing. New tools appear every year. Stay active in builder forums to learn new tricks. Share your own wins with the community. A great looking PC is more fun when others can copy your setup.
Frequently Asked Questions
Can I damage my radiator by plugging it into the wrong RGB header?
Yes. Plugging a 5V ARGB cable into a 12V RGB header sends too much voltage to the LEDs. This burns out the chips inside the strip. Always check the voltage label on your motherboard header before plugging anything in. If unsure, look up the manual or contact support.
Does OpenRGB work with Corsair iCUE devices?
OpenRGB supports many Corsair products, including some Commander Pro and Lighting Node units. Newer iCUE only devices may need extra plugins or may not work at all. Check the OpenRGB supported devices list before relying on it for a Corsair heavy build.
Can I run two RGB control apps at the same time?
You can, but conflicts often appear. Each app tries to claim the device, causing flickering or stuck colors. Pick one main app and disable the others. SignalRGB and OpenRGB both offer takeover modes that handle this automatically.
How many ARGB fans can I daisy chain on one header?
Most motherboard ARGB headers handle up to 60 LEDs per port. That works out to about three to five fans depending on LED count per fan. For larger setups, use a powered ARGB hub to avoid voltage drop and signal loss.
Will mixed brand radiators ever look perfectly identical?
Probably not. Different LED chips and diffusers create small color shifts even at the same hex code. Calibration in software and the use of diffuser strips gets you close. For most viewers, the result is unified enough to look great.
Do I need to update firmware on my RGB controllers?
Yes, sometimes. Firmware updates fix bugs, add device support, and improve sync stability. Check the manufacturer website for your controller every few months. Universal apps like OpenRGB also push updates that improve compatibility with older firmware.
Is wireless RGB sync possible across brands?
Some brands like Nanoleaf and Govee offer wireless RGB. They sync over Wi-Fi using their own apps. Mixing wireless and wired RGB usually requires a smart home hub like Home Assistant. This is an advanced setup but it works for ambitious builders.
Hi, I’m Lily — a tech enthusiast and the voice behind SmartResizerr.com. I love testing gadgets, breaking down specs into plain English, and helping everyday people find the right tech without the overwhelm.