How To Remove Micro Scratches From Self Healing Smartphone Glass?
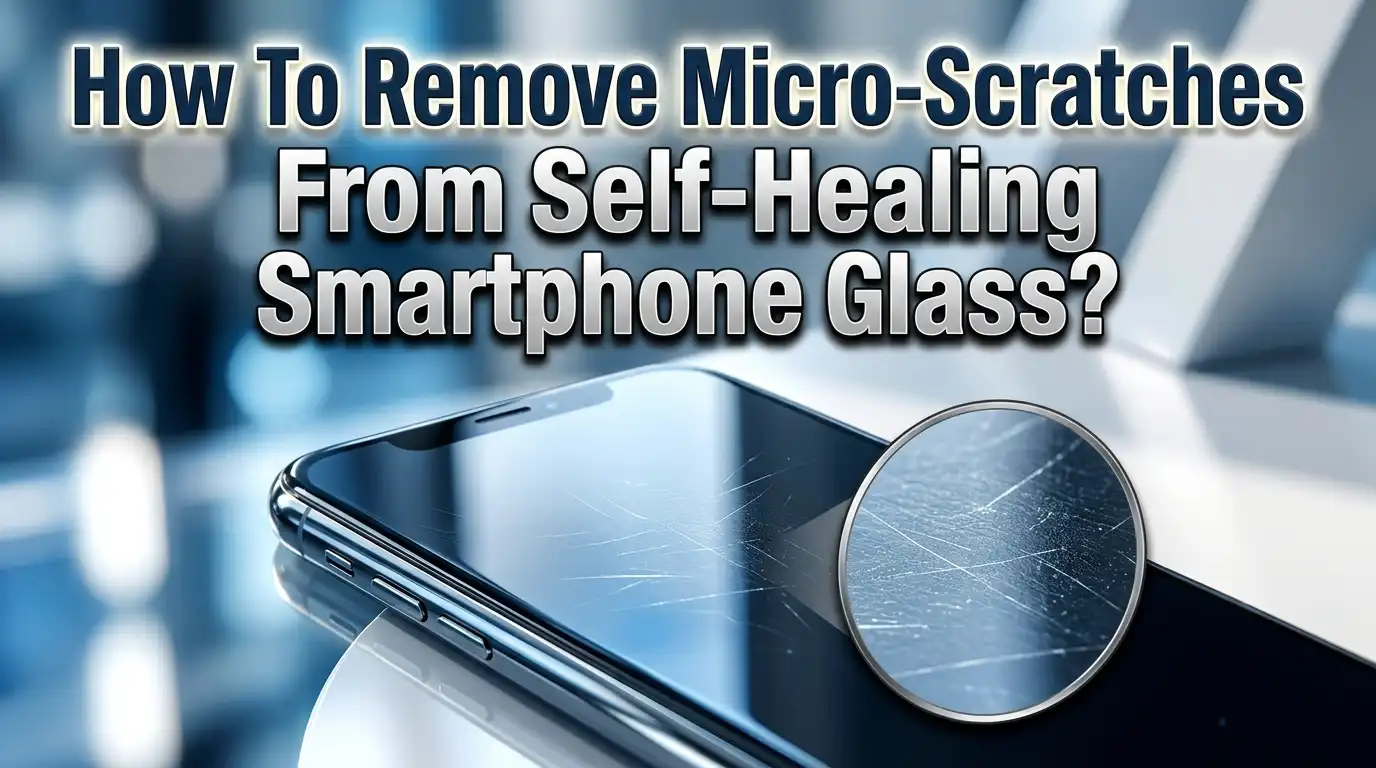
You just bought a brand new smartphone with the latest self healing glass. A few weeks later, you notice a web of tiny micro scratches covering the screen. They catch the light at every angle and make your phone look old. Sound familiar?
Micro scratches are one of the most frustrating problems for smartphone owners. Even phones with advanced self healing glass can develop fine surface marks over time. Sand particles, keys in your pocket, and even your fingernails can leave behind these barely visible but incredibly annoying scratches.
The good news is that you do not need to replace your screen or spend hundreds of dollars on professional repair. Several safe and proven methods can reduce or remove micro scratches right at home.
This guide walks you through everything you need to know about micro scratches on self healing smartphone glass.
Key Takeaways
- Micro scratches on self healing glass are common and happen because everyday materials like sand, dust, and metal objects are harder than the glass surface. Even the best Gorilla Glass or ceramic shield technology cannot prevent every fine scratch.
- Self healing glass has limits. The self healing property works best on very shallow surface marks and relies on special polymer coatings that reform over time. Deeper micro scratches that penetrate past the coating layer will not heal on their own.
- Safe DIY methods exist that can reduce or remove micro scratches without damaging your screen. These include using a magic eraser, headlight lens cream, cerium oxide polish, and applying a fresh oleophobic coating to restore the screen’s smooth feel.
- Many popular home remedies are myths. Toothpaste, baking soda, banana peels, coconut oil, and petroleum jelly do not fix scratches on glass screens. Some of these can actually create new scratches or damage your screen’s protective coatings.
- Prevention is the best strategy. Using a quality screen protector, keeping your phone in a separate pocket, and cleaning your screen regularly will prevent most micro scratches before they start.
- Professional repair is sometimes necessary. If scratches are deep enough to feel with your fingernail, home methods will not fully remove them. A screen replacement or professional polishing service may be the only option.
What Are Micro Scratches on Smartphone Glass
Micro scratches are extremely fine marks on your phone’s glass surface. They are usually too shallow to feel with your fingertip but become visible under direct light. You will often notice them as a faint haze or a series of thin lines when you tilt your screen at an angle.
These scratches typically affect only the top layer of the glass. Modern smartphones use hardened glass like Corning Gorilla Glass or Apple’s Ceramic Shield. These materials rate around 6 to 7 on the Mohs hardness scale. Any material harder than this, such as sand (which contains quartz at Mohs 7), can leave micro scratches on the surface.
The depth of a micro scratch determines whether it can be fixed at home. Surface level scratches that only affect the oleophobic coating (the fingerprint resistant layer on top of the glass) are the easiest to address. Scratches that penetrate into the actual glass require more aggressive treatment. True cracks or deep gouges need professional repair.
Understanding the difference between these scratch types is important before you attempt any removal method. A quick test is to run your fingernail across the scratch. If you cannot feel it, the scratch is likely surface level and a good candidate for DIY repair. If your fingernail catches, the scratch goes deeper and may need professional attention.
How Self Healing Glass Technology Works
Self healing glass sounds like science fiction, but the technology is real and already present in several smartphones. The concept relies on special polymer materials that can reform their molecular bonds after being damaged. Japanese researchers at the University of Tokyo developed a glass like polymer called polyether thioureas that can repair cracks when pressed together at room temperature.
Most current smartphones do not use true self healing glass for their main screens. Instead, they use self healing coatings applied on top of standard hardened glass. The LG G Flex was one of the first phones to feature a self healing polymer coating on its back cover. This coating could repair light scratches within minutes through a process driven by body heat.
Modern self healing screen protectors use thermoplastic polyurethane (TPU) material. TPU has an elastic polymer structure that allows it to bounce back after being deformed by a scratch. The material’s molecular chains stretch and then slowly return to their original position. Heat accelerates this process, which is why some scratches seem to disappear after the phone has been in your warm pocket for a while.
The key limitation is depth. Self healing technology works on scratches that are less than 0.1 millimeters deep. Anything deeper overwhelms the material’s ability to reform. This means micro scratches are actually the perfect target for self healing glass, but not every micro scratch will heal completely on its own. Some may need a little help from the methods described below.
Why Micro Scratches Still Appear on Self Healing Glass
Even with self healing technology, micro scratches continue to appear on smartphone screens. This happens for several reasons that are worth understanding before you try to fix them.
The oleophobic coating wears down over time. Every smartphone screen has a thin fluoropolymer coating that repels oils and reduces fingerprints. This coating is only a few nanometers thick. Daily use, cleaning, and contact with abrasive materials gradually strip it away. Once the coating thins, the bare glass underneath becomes more vulnerable to micro scratches.
Sand and dust are everywhere. Quartz particles found in common dust and sand have a hardness of 7 on the Mohs scale. This matches or exceeds the hardness of most smartphone glass. When you slide your phone across a table or put it in a pocket with tiny dust particles, these harder materials scrape across the surface and create micro scratches.
Keys, coins, and metal objects in your pocket or bag are frequent culprits. While many metals are softer than phone glass, some alloys and rough edges can still cause fine scratches. The pressure and repeated friction add up over weeks and months.
Self healing coatings have a lifespan. The polymer layer that provides the self healing ability degrades with UV exposure, heat cycles, and chemical contact. After several months of heavy use, the self healing ability weakens. Scratches that would have disappeared earlier now remain permanently visible.
The Eraser Method for Light Micro Scratches
One of the simplest and most effective methods for light micro scratches is using a plain white rubber eraser. This technique has been tested by multiple tech reviewers and delivers consistent results on surface level marks.
Step 1: Power off your phone and clean the screen with a dry microfiber cloth. Remove all dust and debris from the surface. Any particles left behind can cause additional scratching during the process.
Step 2: Take a clean white rubber eraser. Avoid colored erasers because they may contain dyes that stain the screen. A standard pencil eraser also works, but a larger block eraser gives you better control.
Step 3: Gently rub the eraser back and forth across the scratched area in a horizontal direction for about 60 seconds. Apply light to moderate pressure. Do not press hard.
Step 4: Switch direction and rub vertically for another 60 seconds. The friction warms the eraser and causes tiny particles to fill in the micro scratches.
Step 5: Wipe the screen clean with your microfiber cloth and inspect the results.
This method works because the eraser material is softer than glass and acts as a mild filler. The fine rubber particles temporarily fill the shallow grooves of micro scratches, making them less visible. The results are not permanent, but you can repeat the process as needed. This is a safe method that will not damage the glass or remove the oleophobic coating if done gently.
Using Headlight Lens Cream for Deeper Micro Scratches
Headlight lens cream is a product designed to restore clarity to foggy or scratched car headlight covers. It also works surprisingly well on smartphone screens for micro scratches that are slightly deeper than surface level marks.
Why it works: Headlight creams contain very fine polishing compounds that gently smooth out scratches in glass and plastic surfaces. The particles in these creams are much finer than those in household cleaners, making them safe for phone screens when used correctly.
Step 1: Turn off your phone. Clean the screen thoroughly with a microfiber cloth dampened with a small amount of isopropyl alcohol. Let the screen dry completely.
Step 2: Apply a tiny drop of headlight lens cream to a clean, soft microfiber cloth. You need very little product. A dot the size of a pencil eraser tip is enough.
Step 3: Gently rub the cream over the scratched area in small circular motions for about two to three minutes. Keep your movements slow and consistent. Do not apply heavy pressure.
Step 4: Wipe the screen clean with a fresh section of the microfiber cloth. Check the results under a bright light.
Step 5: Repeat if needed. Most micro scratches show significant improvement after one or two applications.
This method will remove some of the oleophobic coating around the treated area. You may notice that the polished area feels slightly different from the rest of the screen. The next section of this guide covers how to restore that coating after scratch removal.
Cerium Oxide Polish for Stubborn Micro Scratches
Cerium oxide is a professional grade polishing compound used by opticians and glass repair technicians. It is one of the most effective materials for removing scratches from glass surfaces, including smartphone screens.
Cerium oxide works as a chemical mechanical polish. It simultaneously reacts with the glass surface at a chemical level while physically smoothing out imperfections. This dual action makes it far more effective than simple abrasion.
Step 1: Mix cerium oxide powder with water to create a thin paste. The consistency should resemble pancake batter. Use a ratio of approximately two parts cerium oxide to one part water.
Step 2: Power off your phone. Protect the edges, ports, and buttons with painter’s tape. Cerium oxide paste can get into small openings and is difficult to remove.
Step 3: Apply a small amount of the paste to the scratched area using a microfiber cloth or a felt pad. If you have a rotary tool with a felt polishing attachment, you can use it on the lowest speed setting for better results.
Step 4: Polish the area gently in small circles for three to five minutes. Keep the paste moist by adding a drop of water if it starts to dry out. Dry paste can cause new scratches.
Step 5: Wipe the screen clean and inspect the results. Repeat if necessary.
This method can remove scratches that the eraser and headlight cream methods cannot. However, it will definitely remove the oleophobic coating in the treated area. You will need to reapply an oleophobic coating afterward. Also, avoid using cerium oxide on plastic screen protectors because it is too aggressive for soft materials.
How to Restore the Oleophobic Coating After Scratch Removal
After using any polishing method to remove micro scratches, you will likely need to restore the oleophobic coating on your screen. This is the invisible layer that makes your screen feel smooth and resist fingerprint smudges.
You can tell the coating is damaged when parts of your screen feel sticky or rough compared to other areas. Fingerprints will also be harder to wipe away in areas where the coating has been removed during the polishing process.
Step 1: Clean your screen thoroughly with isopropyl alcohol (90% or higher concentration). This removes all oils, residues, and contaminants from the glass surface. Wipe it dry with a lint free microfiber cloth.
Step 2: Apply 10 to 15 drops of oleophobic coating liquid directly onto the screen. These coating solutions are available from electronics repair suppliers. They contain a fluoropolymer dissolved in a fast evaporating solvent.
Step 3: Wrap one finger in a small piece of plastic wrap or a sandwich bag. This prevents your skin from absorbing the coating liquid.
Step 4: Quickly spread the drops across the entire screen surface using light, fast swiping motions. The solvent evaporates rapidly, so you need to work within about 30 seconds.
Step 5: Do not touch the screen for 8 to 12 hours. The coating needs this time to bond properly to the glass surface. Applying the coating before bed is ideal.
Step 6: Wipe off any residue with a clean microfiber cloth the next morning. For the best results, repeat this entire process two to three times. Each application builds a stronger and more durable oleophobic layer.
DIY Methods That Do Not Work and Can Cause Damage
The internet is full of supposed miracle fixes for scratched phone screens. Many of these methods are completely ineffective and some can actually make things worse. Knowing which ones to avoid will save you time and protect your phone.
Toothpaste is the most commonly recommended home remedy, but it fails on glass screens. Toothpaste contains abrasive particles designed to clean teeth. When applied to phone glass, these particles can create new micro scratches instead of removing existing ones. Toothpaste only works on soft plastic screen protectors, not on actual glass.
Baking soda paste (mixed with water) is another popular suggestion. Testing shows it does nothing to reduce scratches. The moisture in the paste also poses a risk to your phone’s internal components if it seeps into the edges of the screen.
Banana peels are a myth. Rubbing a banana peel on your screen leaves behind a sticky residue that is difficult to clean off. It has zero effect on scratches.
Coconut oil and vegetable oil give your screen a temporary shine that might hide scratches for a moment. Once the oil is wiped away, the scratches return exactly as before. Oils can also clog your speaker grilles and charging port.
Petroleum jelly makes your phone greasy without doing anything for scratches. The oily film actually attracts more dust and dirt, which can create new micro scratches over time.
Powdered household cleaners like baking soda based scrubs are too abrasive for phone glass. They will strip the oleophobic coating and leave new marks on the surface.
Self Healing Screen Protectors as a Solution
If your phone’s glass already has micro scratches, applying a self healing screen protector can serve double duty. It hides existing scratches and prevents new ones from forming. This is often the most practical solution for phones with widespread micro scratches.
Self healing screen protectors use thermoplastic polyurethane (TPU) material. This flexible polymer has a unique molecular structure that allows it to absorb impacts and recover from deformation. When a light scratch forms on a TPU protector, the material’s polymer chains slowly reform and close the gap. Heat from your pocket or direct sunlight speeds up this process.
How to apply a self healing screen protector for the best results:
Clean your phone screen with isopropyl alcohol and a microfiber cloth. Remove all dust particles. Even a single speck of dust under the protector will create a visible bubble. Apply the protector in a dust free environment such as a steamy bathroom (the moisture in the air settles dust). Align the protector carefully and press it down from the center outward. Use a squeegee card to push out air bubbles.
Modern TPU screen protectors from brands in 2025 can heal scratches up to 0.1 millimeters deep within 24 hours. They offer excellent optical clarity at around 99% light transmittance. The flexible material also absorbs shock better than rigid tempered glass protectors, adding an extra layer of drop protection.
The main trade off is feel. TPU protectors have a slightly softer, more rubbery texture compared to glass. Some users notice a difference in the swiping experience. However, for a phone that already has micro scratches, the visual improvement is usually well worth this small compromise.
How to Prevent Micro Scratches in the First Place
Prevention is always easier and cheaper than repair. A few simple habits can keep your smartphone glass looking new for much longer.
Use a screen protector from day one. Do not wait until scratches appear. Apply a tempered glass or self healing TPU protector as soon as you take your phone out of the box. The protector takes the damage instead of your actual screen. When it gets scratched up, you simply replace it for a few dollars instead of dealing with permanent screen damage.
Keep your phone in a separate pocket. Never put your phone in the same pocket as keys, coins, or other metal objects. Even a single key can leave micro scratches if it slides across your screen during the day. Dedicate one pocket exclusively to your phone or use a phone pouch.
Clean your screen regularly. Dust and sand particles trapped between your phone and its case are a major cause of micro scratches. Wipe your screen daily with a clean microfiber cloth. This removes abrasive particles before they have a chance to cause damage.
Avoid placing your phone face down on rough surfaces. Tables, countertops, and desks often have tiny particles of grit on them. Setting your phone face down grinds these particles into your screen. Place your phone face up or use a clean soft surface.
Do not clean your screen with paper towels or tissues. These materials contain wood fibers that are abrasive at a microscopic level. Always use a microfiber cloth designed for electronics. Microfiber lifts particles away from the surface instead of dragging them across it.
When to Seek Professional Screen Repair
Home methods work well for surface level micro scratches, but they have clear limits. Knowing when to stop and seek professional help can save you from accidentally making things worse.
If you can feel the scratch with your fingernail, it has penetrated past the surface coating and into the glass itself. Home polishing can reduce the visibility of these scratches, but it probably will not eliminate them completely. A professional technician with industrial grade polishing equipment can achieve better results on deeper marks.
If scratches cover a large area of the screen, spot treatment becomes impractical. You would need to polish the entire screen surface evenly, which requires experience and specialized equipment to avoid creating uneven spots or removing too much material.
Cracks and chips are not the same as micro scratches. No polishing method can fix a cracked screen. If you see a visible crack line or feel a sharp edge, the glass structure itself is compromised. You need a full screen replacement from an authorized repair center.
Consider the cost versus benefit. If your phone is under warranty or you have device insurance, a screen replacement might be free or very affordable. Check your coverage before spending hours on DIY scratch removal. Many phone manufacturers and carriers offer screen repair programs.
Some specialized mobile repair shops offer nano polishing services that can restore a scratched screen to near new condition. These services use professional equipment and calibrated polishing compounds that deliver results beyond what home methods can achieve. The cost typically ranges from $30 to $80, which is much less than a full screen replacement.
Step By Step Quick Reference Guide
Here is a summary of the safest and most effective approach for removing micro scratches from your self healing smartphone glass. Follow these steps in order for the best results.
Assessment: Examine your scratches under bright light. Run your fingernail across each scratch. If you cannot feel it, proceed with home repair. If you can feel it, consider professional help.
Clean the screen. Use a microfiber cloth with a small amount of isopropyl alcohol. Remove all dust, oils, and debris. Let the screen dry completely before proceeding.
Start with the gentlest method. Try the eraser technique first. Rub a clean white eraser gently over the scratches for 60 seconds horizontally and 60 seconds vertically. Wipe clean and check results.
Escalate if needed. If the eraser method is not enough, move to headlight lens cream. Apply a tiny amount with a microfiber cloth and polish in small circles for two to three minutes.
Use cerium oxide for stubborn scratches. Mix into a thin paste, apply with a felt pad, and polish gently for three to five minutes. Keep the paste moist throughout.
Restore the oleophobic coating. After any polishing method, clean the screen with isopropyl alcohol and apply an oleophobic coating solution. Let it bond for 8 to 12 hours. Repeat two to three times.
Apply a screen protector. Once you are satisfied with the scratch removal results, apply a self healing TPU or tempered glass screen protector to prevent future damage.
Maintain your screen. Clean daily with a microfiber cloth. Keep your phone in a dedicated pocket. Avoid placing it face down on rough surfaces.
Understanding Glass Hardness and Scratch Resistance
Knowing a little about glass science helps you understand why certain materials scratch your phone and why certain fixes work. The Mohs hardness scale rates materials from 1 (talc) to 10 (diamond). Your smartphone glass typically falls between 6 and 7 on this scale.
Corning Gorilla Glass Victus and newer versions are designed to resist scratches from materials rated below 6 on the Mohs scale. This means most plastics, most metals, and even some types of rock will not scratch your screen. However, quartz (found in common sand and dust) sits at exactly 7 on the Mohs scale. This is why beach trips and dusty environments are so dangerous for phone screens.
Sapphire crystal, used on some high end watch faces and camera lens covers, rates at 9 on the Mohs scale. Only diamond (rated 10) can scratch sapphire. Some smartphone manufacturers have explored using sapphire for screens, but the material is brittle and expensive, which limits its use to small components like camera lens covers.
The trade off between scratch resistance and shatter resistance is important. Harder glass resists scratches better but shatters more easily on impact. Softer glass absorbs impacts better but scratches more easily. Smartphone manufacturers balance these two properties based on what most users need. This is why even the most advanced phone glass still gets micro scratches from everyday use.
Cerium oxide polishing works because it is harder than glass and breaks down into finer particles during polishing. These particles smooth out the glass surface at a microscopic level while the chemical reaction between cerium oxide and silicon dioxide (the main component of glass) dissolves a tiny amount of material at the scratch site.
Frequently Asked Questions
Can micro scratches on self healing glass disappear on their own?
Yes, some micro scratches on self healing glass can disappear on their own over time. The self healing coating uses polymer materials that slowly reform their molecular bonds after being deformed. Heat speeds up this process. Placing your phone in a warm (not hot) environment like your pocket for several hours can help shallow scratches heal faster. However, only very shallow scratches that affect the polymer coating layer will heal. Scratches that go into the actual glass below the coating will remain permanently.
Does toothpaste really remove scratches from phone screens?
No, toothpaste does not effectively remove scratches from glass phone screens. Toothpaste contains abrasive particles that can actually create new micro scratches on your screen. It also strips away the oleophobic coating that makes your screen feel smooth. Toothpaste can work on soft plastic surfaces like plastic screen protectors, but it should never be used on glass smartphone screens. Use proven methods like headlight lens cream or cerium oxide instead.
Will a screen protector hide existing micro scratches?
Yes, applying a screen protector can effectively hide existing micro scratches. The adhesive layer of the protector fills in the shallow grooves of micro scratches, making them invisible. TPU self healing screen protectors are especially good at this because their flexible material conforms closely to the screen surface. Tempered glass protectors can also hide scratches, though they may trap tiny air pockets over deeper marks.
How often should I reapply the oleophobic coating on my phone?
The oleophobic coating on your phone wears down with normal use. If you notice your screen collecting fingerprints more easily or feeling less smooth, the coating is fading. Most experts recommend reapplying an aftermarket oleophobic coating every one to two months for phones without a screen protector. If you use a screen protector, the coating on the protector itself will last until you replace it.
Is cerium oxide safe to use on all smartphone screens?
Cerium oxide is safe for use on glass smartphone screens when used correctly. It will not damage the glass or affect touch sensitivity. However, it will remove the oleophobic coating in the area you polish, so you need to reapply that coating afterward. Do not use cerium oxide on plastic screen protectors or on phones with flexible OLED screens that do not have a glass top layer. Always protect ports and buttons with tape before using cerium oxide paste.
Can I use a power tool to polish my phone screen?
You can use a rotary tool with a felt polishing attachment on the lowest speed setting. This is especially useful when working with cerium oxide paste, as the consistent motion produces more even results than hand polishing. However, you must keep the speed low and avoid applying too much pressure. High speeds generate heat that can damage the screen or the adhesive holding it in place. If you are not experienced with rotary tools, hand polishing with a microfiber cloth is the safer choice.
Hi, I’m Lily — a tech enthusiast and the voice behind SmartResizerr.com. I love testing gadgets, breaking down specs into plain English, and helping everyday people find the right tech without the overwhelm.