How To Fix Meta Quest 3 Mixed Reality Room Setup?
Mixed reality on the Meta Quest 3 is an exciting experience, but it only works well when your room setup is done right.
Many users run into issues where mixed reality apps won’t load properly, the passthrough mode feels off, or the headset just doesn’t seem to detect the space around them. These problems are more common than you think, and they are almost always fixable.
The good news is that most room setup issues come down to a few simple settings and steps.
This guide walks you through everything you need to know. You will learn how to scan your physical room correctly, how to toggle between immersive and passthrough modes, and how to adjust your headset for the best mixed reality experience.
We also cover the most common mistakes people make during setup and how to avoid them.
In a Nutshell
- Room scanning is essential for mixed reality apps to work correctly on the Meta Quest 3. Go to Settings → Physical Space to scan your room.
- The “My Space” toggle is the most common fix for MR issues. Switch it from immersive to passthrough mode in the Quick Menu.
- Incomplete room scanning is one of the biggest reasons mixed reality feels broken or inconsistent.
- Proper headset fit matters more than most people think. Tighten the top strap first, then adjust the back strap for a secure but comfortable fit.
- Guardian settings can be accessed through Quick Settings → the cog icon. This is where you manage your play space boundaries.
- Most problems are caused by simple setting mistakes, not hardware faults. Fixing your room setup usually takes just a few minutes once you know where to look.
What Is Mixed Reality Room Setup on Meta Quest 3?
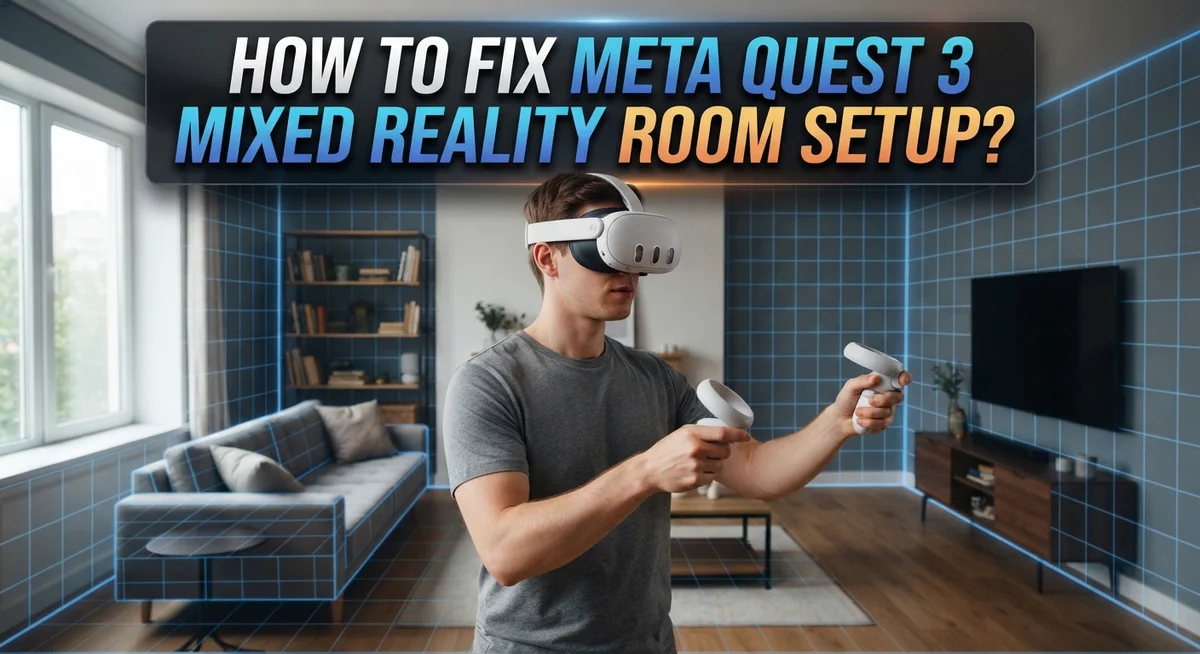
Mixed reality room setup on the Meta Quest 3 is the process of preparing your physical space so that mixed reality apps work correctly. This setup allows your headset to understand your room’s layout and blend digital content with your real surroundings.
Room scanning is the foundation of mixed reality on Quest 3. When you scan your room, the headset creates a digital map of your physical space. This map helps mixed reality apps place virtual objects on real surfaces like tables, floors, and walls. You can scan an entire room or just a small apartment section depending on your needs.
The “My Space” toggle is a critical feature that switches your headset between two modes. Immersive mode shows only virtual environments. Passthrough mode displays your real room with digital elements overlaid on top. This toggle appears in your Quick Menu and controls which mode you’re currently using.
Proper headset fit directly impacts your mixed reality experience quality. When your headset sits correctly, the cameras capture better images of your room. This improves how accurately virtual objects appear in your space. An ill-fitting headset can cause blurry passthrough video and poor object placement.
The Guardian system works alongside room setup to keep you safe. It marks boundaries in your physical space so you don’t bump into walls or furniture while wearing the headset. You access Guardian settings through Quick Settings by tapping the cog icon.
Mixed reality room setup essentially teaches your Quest 3 about your environment. Without proper setup, mixed reality apps may not function correctly or may feel inconsistent. Understanding these core components helps you troubleshoot issues quickly and enjoy a smooth mixed reality experience.
Why Proper Room Setup Matters for Mixed Reality
Proper room setup matters because your Meta Quest 3 needs to understand your physical space before mixed reality apps can work. When you scan your room, the headset creates a map of walls, furniture, and open areas. This map becomes the foundation for everything that happens in mixed reality mode.
Without a complete room scan, your mixed reality apps struggle to place virtual objects correctly. Objects might float in weird spots, sink through walls, or disappear entirely. The experience feels broken because the headset doesn’t know where your actual environment begins and ends.
Room scanning also affects safety and comfort. When your headset knows your space, you can move around freely without bumping into real furniture or walls. The Guardian system uses this information to create boundaries that keep you safe during immersive experiences.
The “My Space” toggle is equally important. This feature switches your headset between two modes: immersive (where you see only virtual content) and passthrough (where you see your real room with virtual objects added). If this toggle is in the wrong mode, mixed reality apps won’t display correctly, and you’ll think something is broken when it’s really just a settings issue.
Headset fit directly impacts your mixed reality quality too. A loose headset shifts during use, which throws off the camera alignment and room tracking. Your mixed reality experience becomes jittery or unstable. A properly fitted headset keeps everything stable and smooth.
Getting these three elements right—room scanning, the “My Space” toggle, and headset fit—prevents most mixed reality problems before they start. You’ll enjoy a smooth, reliable experience instead of dealing with frustrating glitches.
How To Scan Your Room for Mixed Reality on Meta Quest 3
To scan your room for mixed reality on Meta Quest 3, start by accessing your settings menu. Put on your headset and look for the Settings app on your home screen. Open it and navigate to the Physical Room section. This is where all your room scanning happens.
Once you’re in Physical Room settings, you’ll see options to begin scanning. Your headset will guide you through the process step by step. Walk slowly around your space while holding the controllers steady. The cameras on your headset map out walls, furniture, and floor space as you move.
Scan your entire room or apartment if you plan to use mixed reality apps throughout your space. The more complete your scan, the better your mixed reality experience will be. Don’t rush this process. Move at a comfortable pace and make sure you cover all areas where you want to use mixed reality.
Pay attention to corners and edges. These areas help your headset understand your space’s full layout. If you have large open areas, walk through them carefully so the system captures the entire space.
After scanning, your headset stores this information. It uses this data whenever you launch mixed reality apps. Your scan creates a digital map of your physical environment.
If you need to rescan your room later, you can return to Physical Room settings and start the process again. This is helpful if you rearrange furniture or move to a new space. Your headset can handle multiple room scans without any problems.
How To Switch Between Immersive and Passthrough Mode Using My Space
The “My Space” toggle is your primary tool for switching between immersive and passthrough modes on Meta Quest 3. This feature lets you control what your headset displays and how it interacts with your physical environment.
To access the toggle, open your Quick Menu by pressing the button on your right controller. Look for the “My Space” option in the menu. You’ll see it clearly labeled with an icon representing your scanned room.
Immersive mode hides your physical surroundings completely. Your headset displays only the virtual environment from your app. This mode works best when you’re seated or standing in one spot. Your scanned room data stays inactive in this mode.
Passthrough mode activates your room scan. Your headset overlays virtual objects onto your real surroundings. You see your actual room with mixed reality elements placed throughout. This mode requires a complete room scan to function properly.
Switching between these modes takes just one tap. Press the “My Space” toggle to change modes instantly. Your headset responds immediately without restarting any apps.
Important note: If mixed reality apps aren’t working correctly, check which mode you’re in. Many users accidentally leave the toggle in immersive mode when they need passthrough mode active. Switching the toggle often resolves display issues.
Your headset remembers your preference. If you frequently use passthrough mode, keep the toggle activated. You can switch back to immersive mode anytime by tapping the toggle again.
Experiment with both modes to understand which works best for your activities. Some apps perform better in passthrough mode, while others function only in immersive mode.
How To Adjust Your Headset Fit for the Best Mixed Reality Experience
Getting your headset to sit properly on your head makes a huge difference in how well mixed reality works. When the fit is wrong, the headset shifts around, and your virtual objects won’t stay where they should be. You’ll notice drift, blurriness, and frustration.
Start by adjusting the top strap first. This strap carries most of the weight and sets the foundation for everything else. Tighten it gradually until you feel the headset settle firmly on your head. The goal is secure, not squeezed.
Next, work on the back strap. This strap keeps the headset stable when you move your head quickly or look around. Adjust it second so the front and back work together. Make small changes and test how it feels after each adjustment.
The side straps matter too. They prevent the headset from sliding sideways during use. Tighten them evenly on both sides so pressure distributes equally across your head.
Check for comfort regularly. Your headset should feel snug but never painful. If you feel pressure points or headaches after a few minutes, loosen the straps slightly. Comfort and fit work together.
Take your time with these adjustments. Incremental changes work better than big tugs on the straps. Your head size and shape are unique, so what works for someone else might not match your needs.
Once you get the fit right, your mixed reality experience improves instantly. Your headset stays still, tracking stays accurate, and virtual objects behave predictably. You can focus on your apps instead of fighting with the hardware.
Common Mixed Reality Room Setup Mistakes To Avoid
Many people skip critical steps during room setup and end up frustrated. The most common mistake is leaving “My Space” in the wrong mode. Your headset defaults to one setting, but mixed reality apps need the correct toggle to function properly. Check your Quick Menu immediately if your MR apps aren’t responding.
Incomplete room scanning causes major problems. You must scan your entire space, including corners and edges. Rushing through this step leaves blind spots where your headset can’t track your surroundings. Take time to move slowly through each area during the initial scan.
Over tightening your straps creates discomfort and reduces mixed reality quality. A headset that’s too tight causes pressure points on your face and neck. It also shifts your view alignment, making virtual objects appear misaligned with your real environment. Secure but comfortable is the goal.
Ignoring headset fit entirely leads to constant shifting. A loose headset moves during use, which breaks your mixed reality tracking. Your room scan becomes less effective when the device isn’t stable on your head. Adjust the top strap first, then the back strap, using small incremental changes.
Forgetting to rescan after room changes creates confusion. If you rearrange furniture or move to a new space, your old scan data becomes outdated. Your headset can’t properly blend virtual and real elements in a changed environment.
Another frequent error is not experimenting with both immersive and passthrough modes. Different apps work better in different modes. Test both settings to understand which mode suits your activities best. This simple exploration prevents most mixed reality frustration and helps you get the most from your device.
Troubleshooting Meta Quest 3 Mixed Reality Not Working
When your Meta Quest 3 mixed reality isn’t working, the problem usually stems from a few specific issues. Start by checking your “My Space” setting first. This toggle controls whether your headset displays your room or stays in immersive mode. Open your Quick Menu and look for the “My Space” option. If it’s off, mixed reality won’t activate.
Next, verify that your room actually has a scan stored. Go to Settings, then Physical Room. If you see an empty space here, you’ll need to run a fresh room scan. This process takes just a few minutes and captures your environment properly.
Headset fit plays a bigger role than most people realize. If your headset sits too loose, the sensors can’t track your space accurately. Tighten your top strap first, then adjust the back strap until the headset feels secure. It should rest comfortably without pinching your head.
Check your Guardian settings through Quick Settings. Tap the cog icon and look for Guardian options. Sometimes the boundary system needs a reset if mixed reality feels glitchy or unstable.
If mixed reality still isn’t working, try removing and reapplying your headset. This simple action refreshes the sensor connection and fixes many temporary glitches.
Lighting matters too. Low light environments confuse the tracking system. Make sure your room has adequate lighting before troubleshooting further.
Finally, restart your entire headset if nothing works. Hold the power button until it shuts down completely, wait thirty seconds, then power it back on. This resolves most persistent mixed reality problems and restores normal functionality quickly.
Tips for Maintaining an Accurate Room Setup Over Time
Your Meta Quest 3 room setup needs regular attention to stay accurate. The good news is that maintenance doesn’t require complicated steps or special equipment.
Check your room scan regularly. Environmental changes affect how your headset understands your space. Moving furniture, adding new objects, or rearranging your play area can confuse the tracking system. Plan to rescan your room every few weeks or whenever you make significant changes to your physical space.
Keep your play area clean and clear. Clutter on the floor creates obstacles that interfere with mixed reality tracking. Remove small items, cords, and objects that could trip you or confuse the sensors. A tidy space helps your headset maintain accurate positioning throughout your session.
Monitor your lighting conditions. Mixed reality performs best in consistent, moderate lighting. Avoid sudden changes between bright sunlight and dark shadows. If you notice tracking problems, check whether your room lighting has changed recently.
Test your setup periodically. Launch a mixed reality app and walk around your space. Notice if virtual objects stay in place or drift unexpectedly. This simple test reveals whether your room scan remains accurate or needs updating.
Document your preferred settings. Remember which “My Space” mode works best for different activities. Immersive mode works well for certain apps, while passthrough mode suits others. Your headset remembers these preferences, so consistency matters.
Update your headset software regularly. System updates often improve tracking accuracy and room mapping capabilities. Check for available updates in your settings menu monthly.
These maintenance habits keep your mixed reality experience smooth and reliable over time.
Final Thoughts
Getting your Meta Quest 3 mixed reality room setup working correctly takes a little patience, but the process is straightforward once you understand each step.
The foundation of a good experience starts with a proper room scan. Access your Settings, go to Physical Room, and scan your entire space carefully. An incomplete scan causes most of the frustrating issues people encounter.
Your “My Space” toggle is one of the most important settings to understand. Switching between immersive and passthrough modes in the Quick Menu directly controls how mixed reality functions for you.
Never overlook headset fit. Tighten your top strap first, then adjust the back strap second. A secure but comfortable fit helps your sensors track accurately and keeps your experience stable.
Consistency matters more than perfection. Rescan your room whenever furniture moves or your environment changes significantly. Keeping your play area clear and well-lit also prevents most tracking problems before they start.
If something stops working, check your “My Space” mode first. Most mixed reality failures come from being in the wrong mode, not from a deeper technical problem. That single toggle fix solves more issues than people expect.
Regular maintenance keeps everything running smoothly. Test your setup periodically by launching a mixed reality app and walking through your space. Catching small issues early saves you from bigger headaches later.
Mixed reality on the Meta Quest 3 is genuinely impressive when your room setup is dialed in correctly. Follow each step, avoid the common mistakes, and maintain your setup over time.
A little effort upfront creates a much more enjoyable experience every single time you put on your headset.
Frequently Asked Questions
Why isn’t my mixed reality mode working?
Check your “My Space” toggle first. This setting switches between immersive and passthrough modes. Open your Quick Menu and look for the “My Space” option. Make sure it’s set to passthrough mode for mixed reality apps to function properly. If it’s already correct, restart your headset completely.
How do I know if my room scan is complete?
Your room scan is complete when you’ve walked through your entire space and the system has mapped all walls and boundaries. You should see a visual confirmation in your Settings under Physical Room. If you only scanned part of your apartment, go back and rescan the missing areas. A full scan gives you the best mixed reality experience.
What’s the correct way to adjust my headset straps?
Tighten your top strap first to distribute the weight evenly across your head. Then adjust your back strap second for a secure fit. The headset should feel snug but not uncomfortable. Make small adjustments rather than big changes. Proper fit directly affects your tracking accuracy and sensor performance.
Can I use mixed reality in low light?
Mixed reality works best in consistent, moderate lighting. Low light environments confuse your tracking system and reduce accuracy. If your room is too dark, turn on additional lights before using mixed reality apps. Avoid direct sunlight as well, since it can also interfere with sensors.
What should I do if mixed reality stops working after furniture moves?
Rescan your room whenever you rearrange furniture significantly. Environmental changes affect how your headset understands your space. Simply go to Settings, select Physical Room, and run a new scan. This keeps your mixed reality experience accurate and prevents tracking problems.

Hi, I’m Lily — a tech enthusiast and the voice behind SmartResizerr.com. I love testing gadgets, breaking down specs into plain English, and helping everyday people find the right tech without the overwhelm.