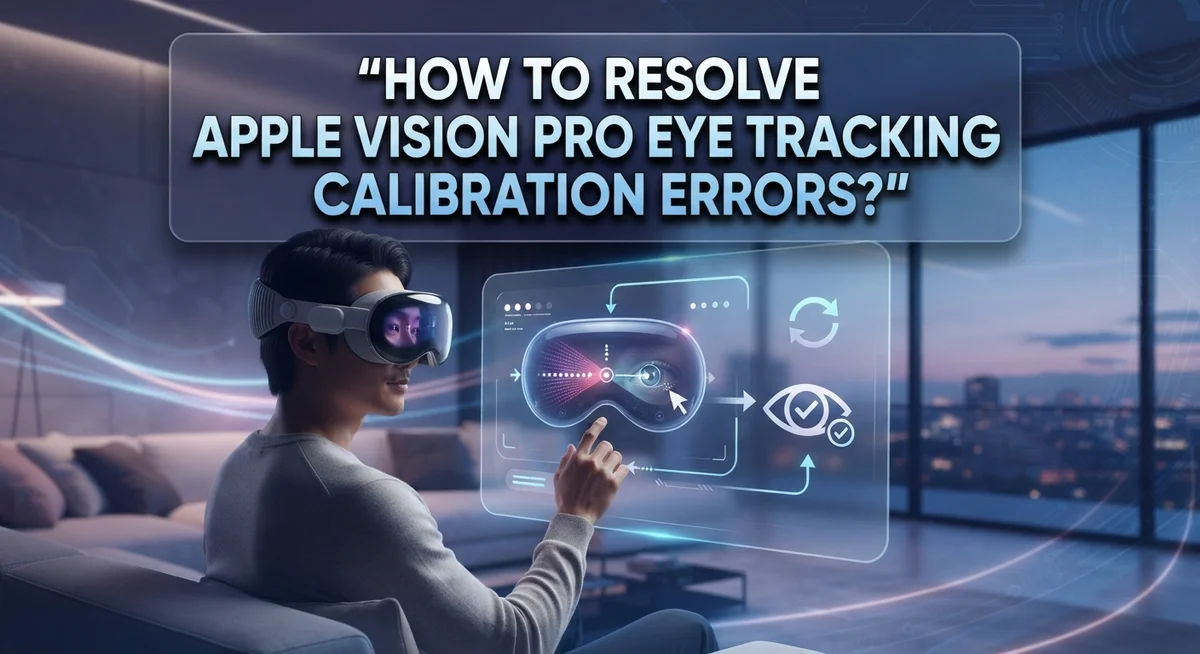
How To Resolve Apple Vision Pro Eye Tracking Calibration Errors?
Apple Vision Pro relies on precise eye tracking to work its magic. But sometimes calibration goes wrong. You look at a button and nothing happens. Or the cursor drifts to the wrong spot entirely.
This can feel frustrating, especially after spending time setting up your device. The good news? Most calibration errors have simple fixes.
Eyelash extensions, rhinestones, or even forcing your eyes to align perfectly can throw off the system. Small mistakes create big tracking problems.
This guide walks you through practical steps to fix eye tracking calibration issues. You will learn how to redo eye setup the right way. We cover common obstacles that block accurate tracking.
In a Nutshell
- Redo the setup. Go to Settings > Eyes & Hands > Redo Eye Setup and follow each prompt carefully.
- Stay still and relaxed. Keep your body stationary and let your eyes glance naturally at each point. Do not force perfect alignment.
- Keep eyes wide open. This helps the sensors get a clear, accurate reading of your eye movement.
- Remove obstructions first. Take off eyelash extensions, rhinestones, or any accessories near your eyes before you start.
- Check device positioning. If tracking feels off, adjust the headset slightly, moving it back by 0.2 to 5 centimeters.
- Update and reset if needed. Update your software and reset settings if calibration still fails after multiple tries.
Understanding Eye Tracking Calibration on Apple Vision Pro
Eye tracking on Apple Vision Pro works by detecting where your eyes point inside the headset. The system uses infrared sensors positioned around the display to monitor your pupil and iris movements in real time.
How the calibration process works involves mapping your unique eye characteristics. When you run the setup, the device learns how your specific eyes move and respond to on screen prompts. This personal mapping ensures accurate tracking throughout your daily use.
The calibration points you see during setup serve as reference markers. Your eyes don’t need to land exactly on these points. Instead, you should glance naturally at each one while staying relaxed. Natural eye movement produces better results than forced precision.
Distance between your eyes and the sensors matters significantly. If the headset sits too close or too far from your face, the infrared sensors struggle to read your eye movements accurately. Proper positioning allows the sensors to capture clear data about your pupil location and size.
Your eye characteristics affect calibration success. Factors like iris color, pupil size, and eyelid shape all influence how sensors detect your gaze. The system adapts to these individual differences during the setup process.
Understanding this foundation helps you troubleshoot problems effectively. When calibration fails, the issue usually stems from one of these areas: sensor obstruction, improper device positioning, or movement during setup.
The calibration data stays stored on your device. Your Apple Vision Pro remembers your eye profile and applies it each time you use the headset. This is why recalibrating sometimes solves persistent tracking issues. The device essentially relearns your eye characteristics and updates its reference points.
Knowing how eye tracking functions helps you recognize what might go wrong. You can then apply targeted fixes rather than guessing at solutions. This understanding bridges the gap between frustration and effective problem solving.
Step-by-Step Guide to Redoing Eye Setup
Before you start the eye setup process, prepare your environment and yourself. This preparation step makes recalibration much more effective.
First, clear your eye area completely. Remove eyelash extensions if you wear them. Take off any rhinestones, stickers, or decorative items near your eyes. Remove glasses or contact lenses unless your prescription is extremely strong. Even small accessories can block the sensors and cause tracking errors.
Next, check your lighting conditions. Sit in a well-lit room with even brightness. Avoid direct sunlight hitting your face, as this creates glare on the sensors. Dim rooms make calibration harder because the sensors need adequate light to detect your eye movements accurately.
Position yourself comfortably. Sit in a chair with good back support. Your head should be level and relaxed. Tension in your neck or shoulders can cause involuntary head movements during calibration, which throws off the accuracy.
Clean the device sensors. Use a soft, dry cloth to gently wipe the internal sensors of your Apple Vision Pro. Dust or smudges on these sensors interfere with eye detection. Be gentle and avoid pressing hard.
Ensure your device fits properly. The headset should feel snug but not tight. If it’s too loose, it will shift during calibration. If it’s too tight, it creates discomfort that leads to eye strain and poor tracking.
Charge your device fully. A low battery can cause processing delays that affect calibration accuracy. Make sure you have at least 80 percent battery before starting.
Take a moment to relax. Calm your mind and breathe deeply. Anxiety or stress can cause your eyes to move erratically. When you feel ready and focused, you are prepared to begin the eye setup process successfully.
Best Practices During the Calibration Process
During calibration, your focus and positioning matter most. Keep your body completely still while the process runs. Movement throws off the sensor readings and creates inaccurate eye maps.
Your eyes should stay wide open throughout the entire session. Squinting or partial closure blocks the infrared sensors from tracking your eye movement properly. Let your eyelids rest naturally without tension.
When you see calibration points appear, glance at them quickly and naturally. This is crucial: do not force your eyes to align perfectly with each point. Trying too hard actually reduces accuracy because forced eye movement creates unnatural patterns the system cannot read correctly.
Let your eyes move smoothly from point to point instead. Your natural glancing motion is what the sensors need to map your unique eye characteristics. The system learns from relaxed, genuine eye movement, not strained alignment attempts.
If the headset feels loose or uncomfortable, pause and adjust it. The device should sit snug against your face without pressing too hard. Improper positioning changes the distance between your eyes and the sensors, which breaks calibration accuracy.
Stay in a well-lit environment during setup. Lighting affects how clearly the infrared sensors detect your eye position. Shadows or dim areas reduce sensor performance.
Take your time between calibration points. Rushing through the process gives sensors insufficient data to create an accurate map. Breathe normally and keep your neck relaxed.
If you feel eye strain building up, pause the calibration and rest for a minute. Tired eyes move differently than rested ones, which corrupts the calibration data. A short break helps you complete the process with better results.
Remember that calibration typically takes just a few minutes when done correctly. Your patience during these moments prevents hours of frustration later with poor eye tracking performance.
Common Physical Obstacles That Cause Calibration Errors
Physical obstacles around your eyes are one of the biggest reasons calibration fails. Your Apple Vision Pro uses infrared sensors to track eye movement, and anything blocking those sensors will prevent accurate tracking.
Eyelash extensions are a common culprit. The artificial lashes sit close to your eye area and can interfere with how the sensors detect your pupils. If you wear them, remove the extensions before starting calibration. Your natural lashes won’t cause problems, but artificial ones will block the sensor’s line of sight.
Decorative items near your eyes also cause issues. Rhinestones, gems, or sparkly eyeshadow can reflect infrared light and confuse the sensors. Remove any jewelry or accessories from your face and eye area. Even small stickers or temporary tattoos near your eyes can disrupt calibration.
Contact lenses themselves don’t cause problems, but the solution residue on them might. Make sure your contacts are clean and dry before calibration begins.
Your eyebrows can occasionally interfere too. If your brows are very thick or heavily styled with products, the sensors may struggle. Keep your eyebrow area clean and dry during setup.
The headset positioning matters as much as what’s near your eyes. If the device sits too low on your face, the sensors won’t have a clear view of your pupils. Adjust it so the sensors align directly with your eyes. The headset should feel snug without pressing too hard.
Before you start calibration, take 30 seconds to clear your entire eye area. Wash your face and remove all decorative items. Wipe away any makeup residue around your eyes. This simple step prevents most physical obstacle problems.
If calibration still fails after removing obstacles, the issue likely involves something else. But always start by clearing your eye area first, as this solves the majority of physical blocking problems.
Adjusting Device Fit and Distance for Accurate Tracking
Your Apple Vision Pro needs to sit at the right distance and angle from your face for eye tracking to work. The device positioning directly affects how well the sensors can see your eyes.
Start by checking how the headset feels on your face. The device should feel snug but not tight. If it’s loose, your eyes move around inside the headset during calibration. This movement breaks the tracking process. Gently tighten the straps until the headset stays stable when you move your head.
Next, adjust the device distance from your eyes. Most people position it too close or too far away. The ideal distance is between 0.2 to 5 centimeters from your face. If calibration keeps failing, try moving the headset slightly backward by a few millimeters. This small adjustment often fixes tracking errors.
Pay attention to the angle of the headset. The device should align with your eyes so the internal sensors have a clear view. If you tilt your head back or forward during calibration, the sensors lose their angle. Keep your head level and still throughout the entire process.
After adjusting the fit and distance, restart the calibration. Go to Settings, select Eyes and Hands, then choose Redo Eye Setup. Follow the on-screen instructions without skipping any steps.
Stay completely still during calibration. Even small movements of your head or body can disrupt the process. Sit in a chair with good back support so you don’t shift around.
If the headset still feels uncomfortable after adjustments, pause and take a break. Your comfort directly impacts calibration success. When you resume, the device should feel secure and stable on your face. Proper fit removes one of the biggest obstacles to accurate eye tracking.
Mistakes to Avoid When Calibrating Eye Tracking
When you calibrate eye tracking on Apple Vision Pro, certain mistakes can quickly derail the process and leave you frustrated. Understanding what to avoid helps you get accurate results on your first or second attempt.
Forcing your eyes to align perfectly with calibration points is the biggest mistake you can make. Your natural eye movement works better than rigid staring. When you try too hard to lock onto a point, your eyes become tense. This tension actually confuses the sensors and reduces accuracy. Instead, let your gaze drift naturally from point to point.
Another common error involves rushing through the calibration steps. You might think speed helps, but the system needs time to collect accurate data about your eye patterns. Moving too quickly between points prevents the headset from capturing enough information. Take your time and breathe normally throughout the process.
Wearing items that obstruct your eyes is a critical mistake many people overlook. Eyelash extensions, false lashes, or decorative accessories near your eyes block the infrared sensors. Even rhinestones or jeweled eye patches will cause problems. Remove everything before starting calibration.
Not checking your device positioning beforehand causes failures too. If your Apple Vision Pro sits too close or too far from your face, the sensors cannot track properly. Make sure the headset feels snug but comfortable before you begin.
Skipping the software update before calibration is another mistake. Outdated software sometimes has bugs that interfere with eye tracking. Always update your system first.
Finally, avoid attempting calibration when you are tired or your eyes are irritated. Dry, fatigued eyes move differently than rested ones. Your calibration data will be based on abnormal eye behavior. Wait until you feel alert and your eyes feel fresh.
These mistakes are easily preventable with awareness and patience.
Advanced Troubleshooting for Persistent Calibration Issues
When calibration errors persist despite your initial attempts, you need a structured approach to identify the root cause. Start by completely resetting your eye tracking settings through Settings > Eyes & Hands > Redo Eye Setup. This clears any corrupted calibration data that might be causing repeated failures.
Next, check your software version. An outdated system can create compatibility issues with eye tracking sensors. Go to Settings > General > About and verify you have the latest update installed. If an update is available, install it before attempting calibration again.
Environmental factors also matter. Calibration works best in consistent lighting conditions. Avoid direct sunlight or harsh shadows across your face during setup. Poor lighting confuses the infrared sensors that track your eye position. Move to a well lit room with even illumination throughout.
If errors continue, examine your eye area one more time with extreme care. Even tiny obstructions can trigger persistent failures. Check for makeup residue, dust on your eyelashes, or dried contact lens solution. These microscopic particles reflect light differently and confuse the tracking system. Clean your face thoroughly and inspect the area around your eyes with a mirror.
Try adjusting your device position manually. Move the headset backward 0.2 to 5 centimeters from your face and retry calibration. Sometimes the sensors need slightly different positioning to function properly.
During the actual calibration process, remember that relaxed eye movement works better than forced alignment. Glance naturally at each calibration point rather than straining to lock your gaze perfectly. Your eyes work best when they move freely without tension.
If these steps still don’t resolve the issue, take a break for several hours. Eye fatigue can interfere with tracking accuracy. Return to calibration when your eyes feel fresh and rested. This simple approach resolves many stubborn calibration problems.
Final Thoughts
Eye tracking calibration on Apple Vision Pro works best when you follow a simple approach. Small adjustments often fix big problems. Your eyes, your device fit, and your patience all play a role in getting this right.
Remember that calibration rewards a relaxed mindset. Your eyes naturally move toward calibration points. Trust this process instead of fighting it.
Most calibration errors trace back to three things. These include physical obstructions, incorrect device position, and outdated software. Check these first before assuming your device has a deeper problem.
Take your time during setup. Rushing through calibration steps almost always leads to poor results. A few extra minutes now saves you frustration later.
If your first attempt fails, don’t panic. Recalibration is normal and many users need several tries before eye tracking feels accurate. This process improves with practice.
Keep your software updated regularly. Apple releases fixes for tracking issues through system updates. Staying current helps prevent many common calibration errors.
Pay attention to your eye area before each session. Remove any accessories or items that might block sensors. This simple habit prevents most tracking failures.
If problems continue after trying every fix, contact Apple support. Sometimes hardware issues need professional attention beyond basic troubleshooting.
Your Apple Vision Pro experience depends heavily on accurate eye tracking. Getting calibration right transforms how you interact with the device. It turns frustrating moments into smooth, natural control.
Stay patient throughout this process. Good calibration takes practice and small adjustments. With the right approach, you will get reliable eye tracking that responds naturally to your movements.
Follow these steps consistently and you will resolve most calibration errors. Your Apple Vision Pro will then work as intended, giving you a seamless and enjoyable experience every time you use it.
Frequently Asked Questions
Why does my eye tracking keep failing even after I recalibrate?
Eye tracking failures usually stem from three main causes. First, check if anything blocks your eyes like eyelash extensions, rhinestones, or decorative accessories near your eyes. Second, verify your device sits at the correct distance from your face. Third, ensure your software is fully updated before attempting calibration again.
Remove all eye obstructions and try the calibration process once more. If errors persist, take a break for several hours and retry later. Sometimes your eyes need rest before recalibration works properly.
What should I do during calibration to get accurate results?
Keep your eyes wide open and let them move naturally. Glance quickly at each calibration point without trying to force perfect alignment. Remaining stationary throughout the process is essential for accuracy.
Relaxed eye movement works better than forced alignment. Your natural gaze will produce more reliable tracking than straining to hit exact points. Take your time and follow each on-screen instruction completely.
Can I adjust my device position if calibration isn’t working?
Yes, manual adjustment helps. Try moving your device backward 0.2 to 5 centimeters if calibration fails. Improper positioning often causes tracking errors that recalibration alone won’t fix.
Check your device distance before starting the setup process. Correct positioning makes the calibration process significantly more successful.
What’s the first step if calibration keeps producing errors?
Navigate to Settings, then select Eyes and Hands, and choose Redo Eye Setup. Follow all on-screen instructions carefully without skipping any steps.
Before you start, inspect your eye area for obstructions and confirm your software is updated. These simple checks prevent most recalibration failures.

Hi, I’m Lily — a tech enthusiast and the voice behind SmartResizerr.com. I love testing gadgets, breaking down specs into plain English, and helping everyday people find the right tech without the overwhelm.